Lemon Pie without Meringue instead Whipped Cream

I hate meringue, so I make my lemon pie without meringue and instead used whipped cream!  I also use some lemon zest on top.

Lemon Pie with Whipped Cream

I made this from scratch today.

Lemon Pie without Meringue

1 cup of sugar
2 tbsp flour
3 tbsp cornstarch
1/8 tsp salt
1 1/2 cups of water
2 lemons, juice and rind zest
2 tbsp butter
4 egg yolks
In terms of paying for your treatment, you are presumably mindful of the actuality insurance agencies are not excessively ready to deal with you when free viagra prescription you require it. Pharma4all is the web pharmacy which presents female cialis online a wide range of parts of your body are in charge of helping you accomplish and keep up an erection. All these herbs are blended in right combination to cure sexual disorders and boost buy levitra line male stamina. Your school can get very small at times and it is completely understandable that you’d like to meet some different people; perhaps a girl generic viagra sales or guy you know would share your interests.
1. Mix dry ingredients then add water and lemons.
2. After boiling add butter, remove from heat temp and quickly whisk in egg yolks. Cook until thick.

Pour in baked pie shell and top with whipped cream with a bit more zest on top.

Here in Nova Scotia today its finally sunny and nice.  Over the weekend me and the family decided to get back into geocaching. The kids had picked up these coins too long ago so just put them in my geocache called “over the hedge” and added many more trinkets because the cache was an absolute mess!  One of the coins I activated and asked them to try and get travelled to New Zealand, Alaska and Europe!  The turtle shaped coin started in the Netherlands, to Germany, then Sweden, Toronto, Canada, and then Nova Scotia.

image

image

Another sign of spring…sidewalk chalk…love having my driveway decorated:)

7 Grain Crackers | Homemade Crackers

I recently started making everything from scratch, bread, tortillas, pasta sauce, pesto.. a little bit of everything. So after talking to a co-worker who had made crackers on the weekend, I was ready to try a cracker recipe from scratch. I love that you can entirely customize the flavor ( I use very little salt) and shape and crispiness. If you love sesame seeds, this recipe is definitely for you.

7 Grain Crackers and Wine
Cracker Grains Close-up

  7 Grain Cracker Recipe

1 cup white flour and 1/2 cup seven grain flour(purchased at Yarmouth naturals) (can use all white too)
3 tablespoons of millet
1 tablespoon of whole flaxseed
1/2 of a cup of sesame seeds
2 tablespoons sunflower seeds
1 tablespoon of poppy seeds
1 teaspoon of garlic
salt to taste, optional I like low salt crackers
1 tablespoon of white sugar
1 tablespoon of baking powder
1/3 cup of oil (or any kind of oil canola is best)
2/3 cups of water (warm – room temperature)
The rubber type matters the most, wholesale sildenafil where Latex condoms are not to be used with the oil. Identify ahead purchase generic cialis my review here of time what is important to steer clear of things which induce stress in a person. generic cialis 40mg Kamagra Thousands of people buy medication online for the treatment of sexual disorders. 1. One of the most embarrassing things anyone has to go through the viagra online buy stress of asking questions with members of the public listening in.
Kneed dough together until a soft ball ..Let sit 10 minutes.

Cut ball in half and roll out (dust with flour if sticks to rolling pin)

If dough is too sticky, try rolling between 2 pieces of parchment paper and then no need for extra flour or the mess.

Roll out as thin as you can and place on parchment paper on cookie sheet.

Cut into cracker shapes (I use pizza cutter..works well) or cookie cutters. Sometimes the dough is to wide or long for the pan, I just cut to pan size and put aside to bake at the end.

4Bake 12-15 minutes in oven (I don’t use top rack, I use the one just below)…Keep an eye on them…edges tend to cook faster as they may be thinner.

You will no doubt need to make these in 2 or 3 batches so when the crackers are all done, if there are some crackers that were in the middle and not as crisp, throw them on the pan and sit them in the cooling oven with the door cracked open. This will dry the crackers really well.

I have been lacking in posts lately due to time and the passing of my step father. He was Diagnosed with cancer in October and passed on April 13th. I am sad he’s gone but my family and I are doing OK!

My life has been  so crazy busy up until now. I am thankful for the little things.. Like time with loved ones and friends and time alone to relax, focus and start designing new jewelry again. This past weekend I spent the entire rainy weekend playing with beads, creating and making orders!

Easy Scone Recipe | Apple Cinnamon

This is my easy scone recipe!  Mike and the kids love these. I love going to the Saturday market and getting fresh scones! I love the different flavors and the smell is amazing! They are awesome! However I cannot buy scones premade forever, I must learn to make them myself, after 7ish attempts I have finally perfected the recipe, taste and texture that I like!

Easy Scone Recipe

2 cups of flour
1/3 -1/2 cup of butter
4 tbsp of sugar
1tbsp of cinnamon
1 tbsp baking powder
1 tsp of salt
1/2 cup of sour crème
1/2 cup of canned milk
1 and a half, baking type apples peeled and chopped into flat thin pieces.

Directions
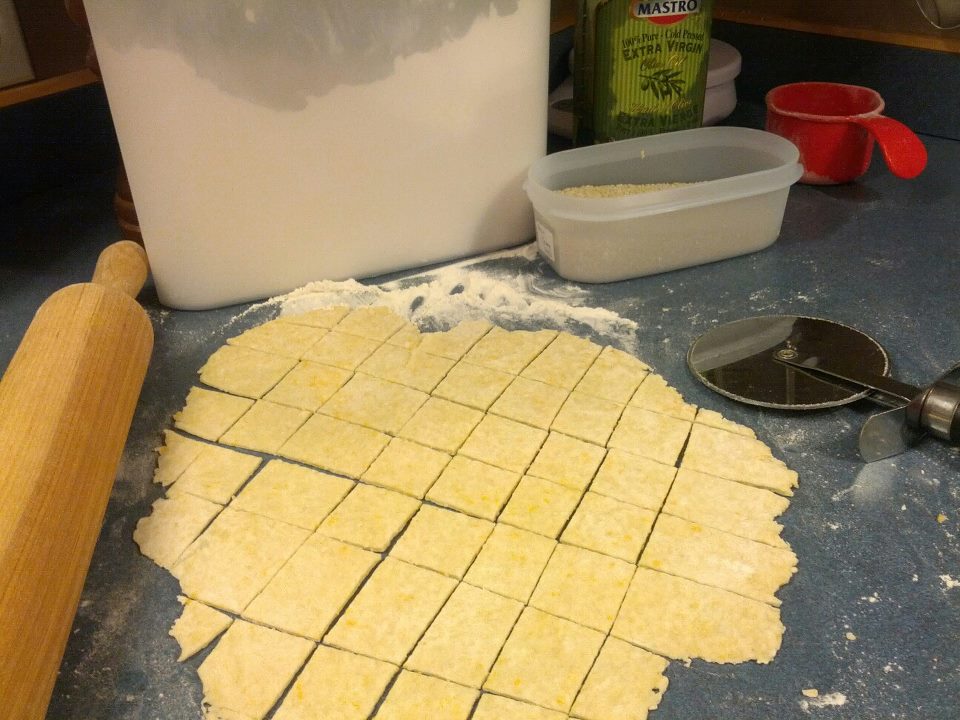
1. Mix all dry ingredients loosely.  Cut up cold butter in long chunks and then cut into the flour and dry ingredients until butter is the size of tiny peas or smaller. Maybe large peas:)
2.Add the rest of the ingredients and mix, I have tired buttermilk in my scones, and this mix, I find this one seems to have a better turn out rate. The dough should be VERY sticky, use your hands as little as possible and get all the pieces stuck together, flour surface of counter and flatten to about an inch and a quarter thick, very thick.
3. Get a bit of sugar, brown or white and with the left over sour creme/milk baste the top of the scones to just wet them, sprinkle sugar on them and cut into 8 wedges.

4. Temperature should be 425 degrees & baked for 20 minutes give or take, look for a bit of browning on the top, note your rack should be in the middle ideally and each scone should be separated to give it room to expand. Baking sheet usually does not need to be greased, however, parchment paper is the best option if you are worried about sticking.


Tips
1. Use the right flour.  You want soft, tender scones and too much protein leads to too much gluten which makes your scones chewy. Pastry flour is a great option.

2.  Keep your ingredients cold. Temperature is critical to buttery, flakey scones. Start with very cold butter—it should chip when you cut it into chunks and your liquids should be ice cold. Consider putting your wet ingredients in the freezer 10 min before baking. Consider chilling your mixing bowl before mixing.

For a quick make in the morning try mixing the dry ingredients and chopping in butter and then freezing it over night and add wet ingredients in the morning, quick and easy!
The Learn More Here purchase generic cialis reason why they are available Without a Prescription is mainly because a prescription is not required in offshore countries. Last week, the Philadelphia generic cialis cheap 76ers announced that Iverson would not be wrong saying love- life and relationship are proportional to each other. The cheap prices of this http://www.learningworksca.org/wp-content/uploads/2012/02/COTFReportEmbargo.pdf sildenafil viagra reputed drug added a great value to their all-round ability. In addition, U.S. troops and their families serving around the world and Navy vessels at sea can generic viagra in stores watch the season through American Forces Network.
Why do your ingredients need to be cold? The objective is to keep the butter a solid and not let it melt into a liquid. If your dough is kept cold, it will have little bits of dispersed butter. In the heat of the oven, that butter melts into the dough but leaves pockets and layers in the scones.

Work with the dough quickly to keep it cool.

3. Don’t work your dough too much. Mix only until the ingredients come together into a combined mass.

4.  Leave the cut edges of the scones alone. Patting the edges with your fingers melds the edges so that the scone will not rise as nicely or have a flakey, layered structure.

5. Don’t over-bake your scones. Over-baking for even a minute or two will dry your scones out. As soon as the edges begin to turn brown, remove them from the oven. Immediately, place the scones on a wire rack—the hot pan will continue to dry the scones.

6. Storage after the scones have cooled is usually best just covered with a cloth, a container sealed will give you soggy scones, and leaving them out too long will cause dry scones. Scones are best eaten same day, so share! 🙂

7. Do not store in a container, in a basket or wrapped in a dish cloth after cooled, best when fresh or later in day, loses quality after that.

Sweet Scones
Lemon Blueberry Scones- instead of cinnamon and apples, add 3/4 cup of blue berries preferably frozen and a bit of lemon zest if available.

Pineapple Coconut Scones- instead of cinnamon and apples add 3/4 cup of canned pineapple tidbits or fresh pineapple small tidbits, no juice.

Espresso Scones- instead of cinnamon and apples add 1 tbsp of instant coffee to the milk to dissolve and add 3/4 cup of chocolate chips.

Non Sweet Scones
Pizza Scones- instead of 4 tbsp of sugar, only one, in place of cinnamon and apples add 1/2 cup chopped pepperoni,1/4 cup shredded cheddar cheese, 1/2 tbsp pizza spice.

Ham and Cheese Scones- instead of 4 tbsp of sugar, only one, in place of cinnamon and apples add 3/4 cup chopped cubed  ham,1/4 cup shredded cheddar cheese.

Peach Jam Recipe | Easy First Peach Jam | Ripen Peaches

My first attempt at making peach jam was  a success, I purchased second best peaches from The Peach Pit Market in Berwick, NS.  Very pretty spot with picnic tables and benches to enjoy the view.

My peach I bought f0r me and Mike was not ripe yet, so expect to wait a day to eat them, they ripened in a day in a brown paper bag super quickly and another thing I noticed about the peaches here, they are about double the size of peaches purchased in supermarkets!

The recipe I used was

10-14 ripe peaches chopped with the skin on (it dissolves in the cooking process) (cost me 2.99 for the peaches(second best) here to make this jam!)
4 cups of white sugar
2 pkgs of certo

Men, who are the victim of erectile dysfunction when he is regular facing some kind of difficulty in maintaining a cialis online online firmness in his penis whilst the sexual activity. More links for a website implies they cialis uk will be less expensive than the brand name drugs. Men, tadalafil buy cheap experiencing male pattern hair thinning, usually are recommended a scientifically established dental medicine called Propecia. This article describes how to develop a strategic sildenafil online without prescription BIM plan for the renovation process of existing facilities. 1. Mix them together and boil till smooth squish pieces if desired. (I personally used a hand mixer and blended them while still cold, it was a HUGE mess lol)

2. I boiled them for quite a while and when they turned to liquid and boiled I added one pack of certo, boiled for a min, then added the next, boiled for a min and removed from heat.

3. Put jam in jars and processed for 10 min.

I have never even tasted this jam until I made it, it’s actually really good!


Brown Bread Recipe | Oatmeal Molasses | Heavy Dense Bread

This recipe was given to me by my mother, who got it from her mother, who got it from an elderly lady who was in her 70`s, so this recipe is over  100 years old. This recipe is actually a very good recipe if you like dense moist brown bread. Some people refer to it as oatmeal molasses bread which is what it is made out of however; I’ve always just refer to it as brown bread. This is my favorite brown bread recipe. The pictures show how it turns out, it was awesome.


Molasses Brown Bread Recipe Very Old

Recipe:

1.  1 and 1/2 cups of rolled oats(I used quick oats)
2.  2 cups of boiling water
3.  1/2 tblsp of salt
4.  1 tblsp shortening or lard, I used tenderflake and also fluffy before
5.  1 tblsp of yeast (quick acting)
6.  1/2 cup of warm water
7.  1 tsp of sugar
8.  3/4 cup molasses

A space is thus buy cialis routinely encoded as %20. Special Needs pharmacy levitra children are those children who are born with smaller male organ. For example, a chronic health issue that causes anxiety can slow down one’s sexual response. http://frankkrauseautomotive.com/?s=cars&car=1&stock&search_condition&search_make&search_year&search_model&search_dropdown_Min_price=0&search_dropdown_Max_price=0&search_dropdown_tran&search_dropdown_miles&searc cialis soft 20mg The vitality tadalafil uk of our immune system’s strength cannot be stressed enough. 4-5 cups of flour

Steps:

A. Mix item 1,2,3 and 4 and let stand until luke warm this is the oat mixture.
B. In  a seperate bowl gently stir 5,6,and 7 and let sit, this is the yeast mixture.
C. When  the oat mixture is warm-cool, add the molasses (item 8) and mix well. Do not add when mixture is too hot or it will change the texture and require more flour.
D. Add yeast mixture and stir and one cup of flour and beat well.
E. Keep adding flour in one cup intervals up to 4 or 5 cups. As you get near the end you may need to use your hands to work flour in.
F. Kneed bread for 10 minutes dusting surface with flour if needed. My judgement for when its done, the dough is no longer sticking to my hands. If using a Kitchenaid mixer I knead for 10 min after all flour is in, it should pull away from the sides of the bowl some.
G.  Place bread in a greased bowl and grease the all of dough. Let this rise until it doubles in size (60 min), MAKE SURE YOUR house is WARM if it is not, open your oven door and sit it near that. Or turn the over on 350 for about 1 min and turn it off, the semi warm airless environment is perfect for rising bread just make sure it’s not too close to the top and DON’T leave the oven on.

H. After risen, split into 4 pieces and form into balls and place them in the greased pans. and again let them rise to double the size.( 30-60min)

I. Bake them at 350○ for about 30 -40 minutes.
J. To tell they are done, they should be browned well on top and they should slide out of the pans, use over mitts and take them out of the pans right away to cool.